Everything you
need to build it right.

Scanned the QR code on your packaging? You’re in the right place. Watch the full walkthrough below, then follow the step-by-step for assembly, mounting, dismounting and disassembly.

01 WATCH FIRST

The full walkthrough.

One video, start to finish — box to canvas. Watch it once before you start, then use the step-by-step below as a reference while you build.

Building 1 module Formaet

Building 2 module Formaet

Building 4 module Formaet

02 STEP BY STEP

Assembly, canvas mounting,
and and wall install.

No workshop required- no tools needed. Snap the pieces together, clip on the fabric canvas. Quick and easy.

Assembly

Building the canvas frame

Snap the Segments and Connectors by hand, and lock them together with the Pins.
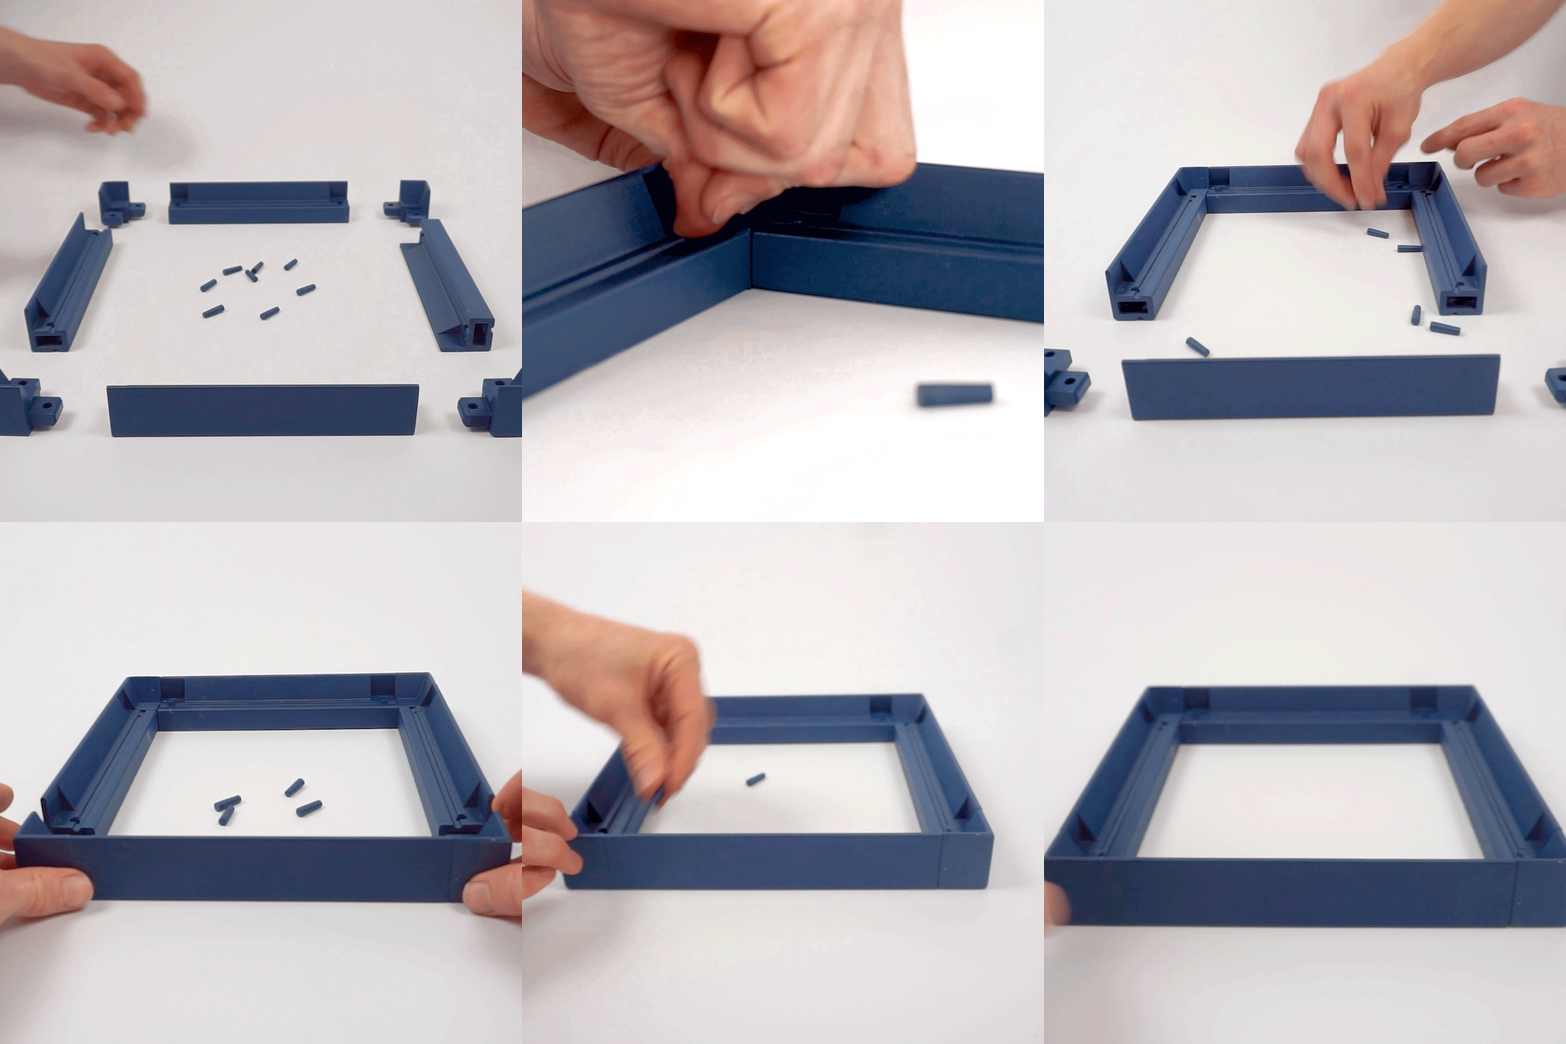
1 Module
Connect Exterior Segments with 4 Connector L, and lock in with the Pins.
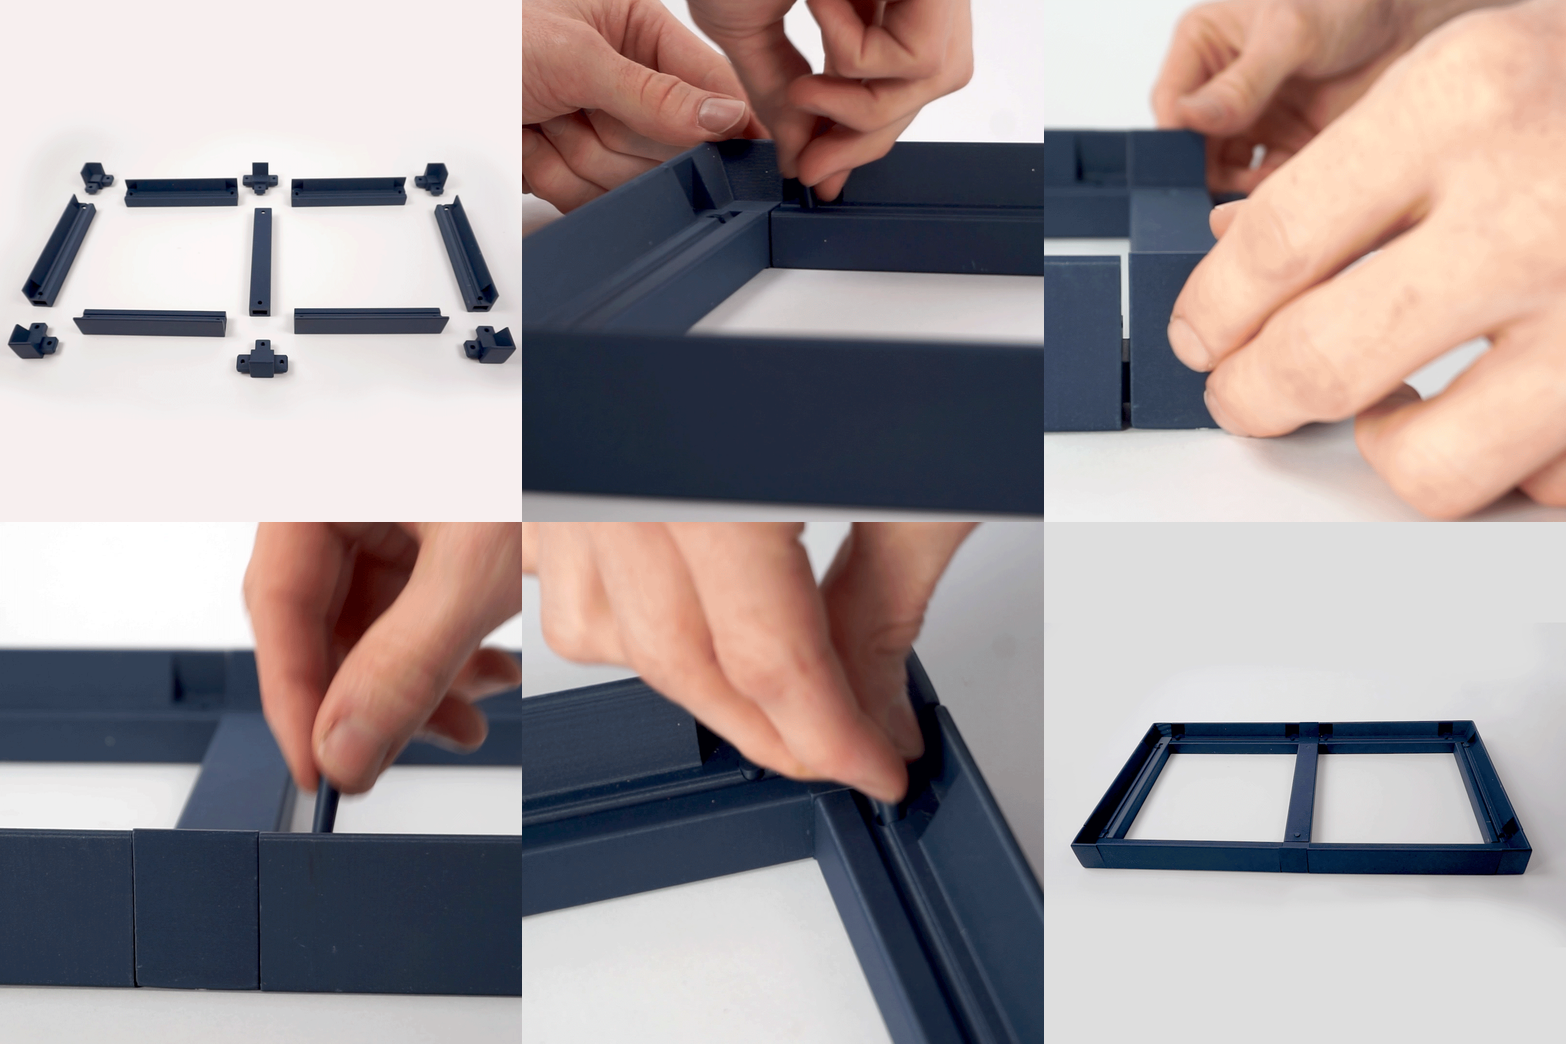
2 Module
Change 2 Connector L for 2 Connector T, and add 2 Exterior Segments and 1 Interior Segment. Lock in with Pins.
4 Module
The outer canvas frame is made of Exterior Segments, and the Interior support system is made of Interior Segments. 8 Exterior Segments, 4 Interior Segments. Connect the corners with Connector L and the intersections of Exterior Segments and Interior Segments with Connector T. The Connector X holds the Interior Segments together. Lock in with the Pins.
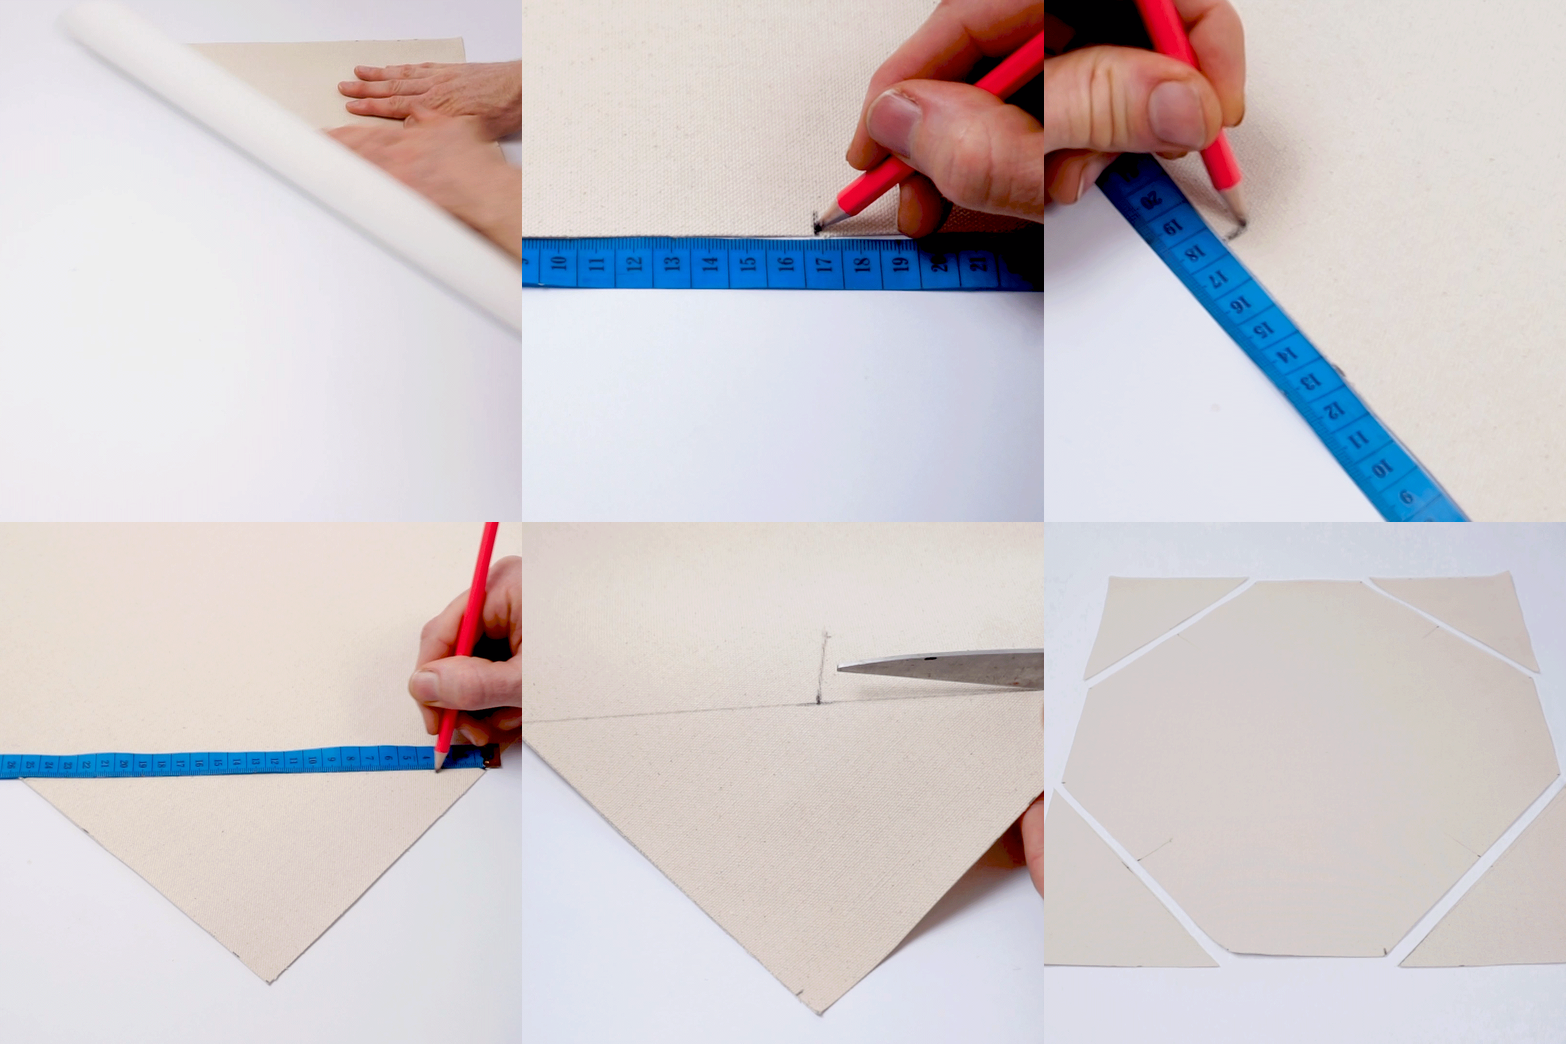
Fabric preparation

The right fit starts with preparation

  1. Cut the canvas to size: 11 cm margin on each side of your Formaet.
  2. From each corner of the fabric, measure 17.5cm, trace a line between the points and cut.
  3. Measure the cut; it should be 25 cm. Make a mark in the middle: 12.5cm.
  4. Trace a perpendicular line from that point toward the centre of the fabric.

Mounting Fabric

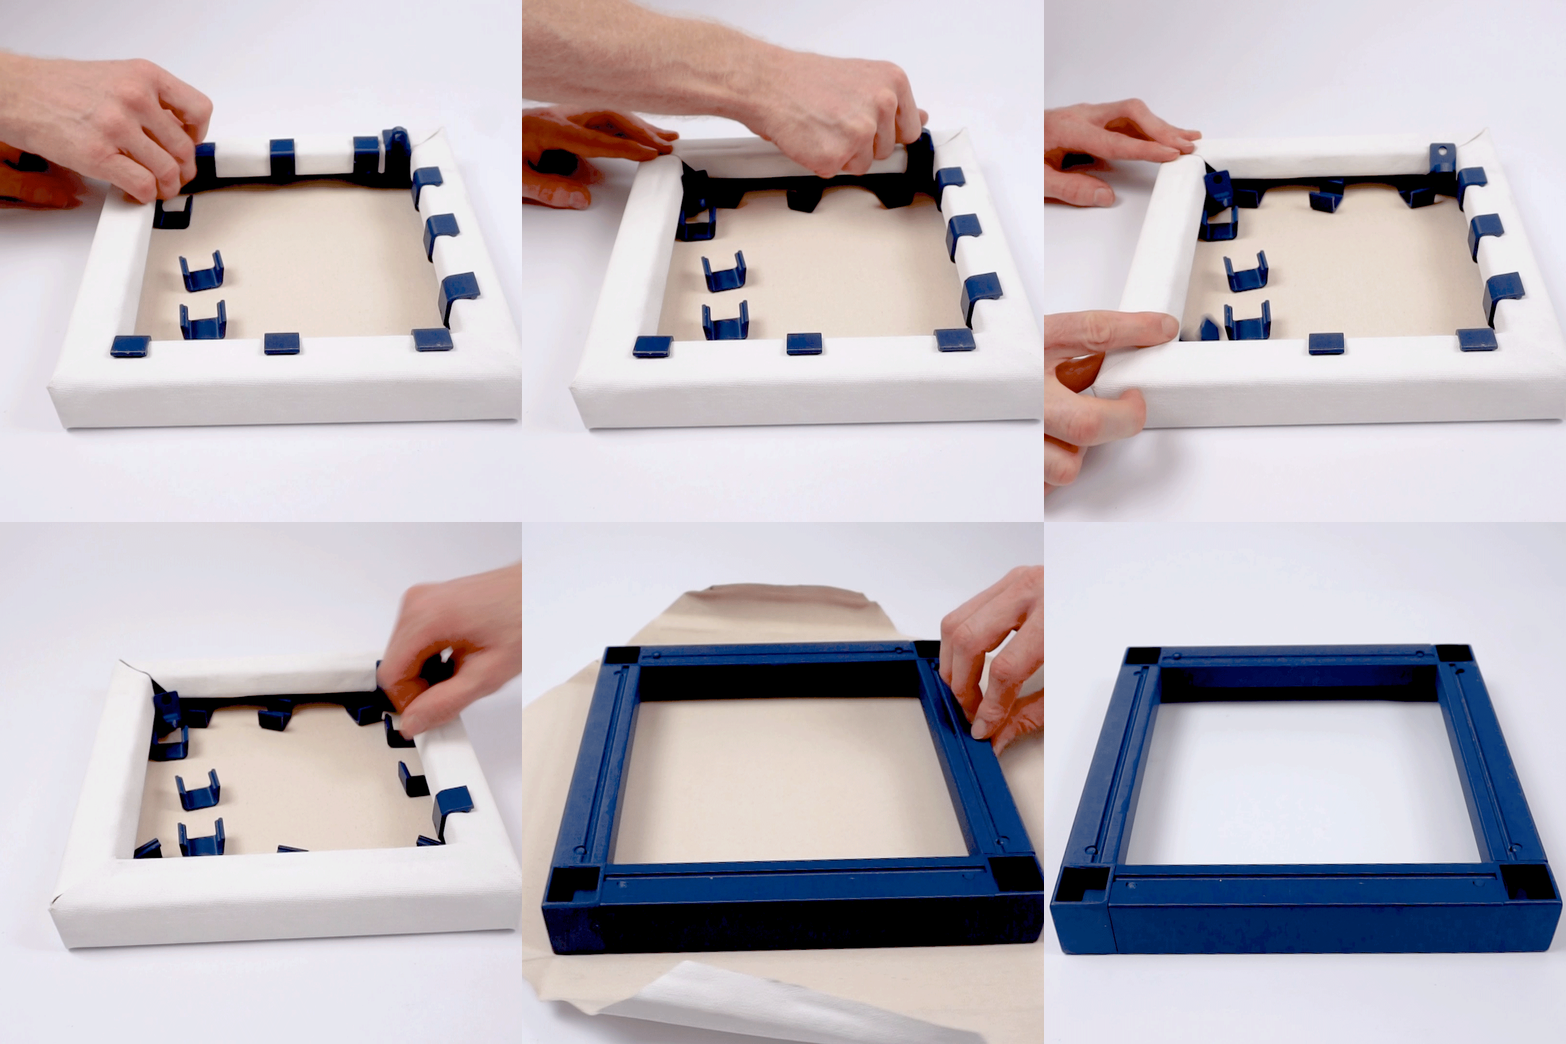
Clipping the canvas on
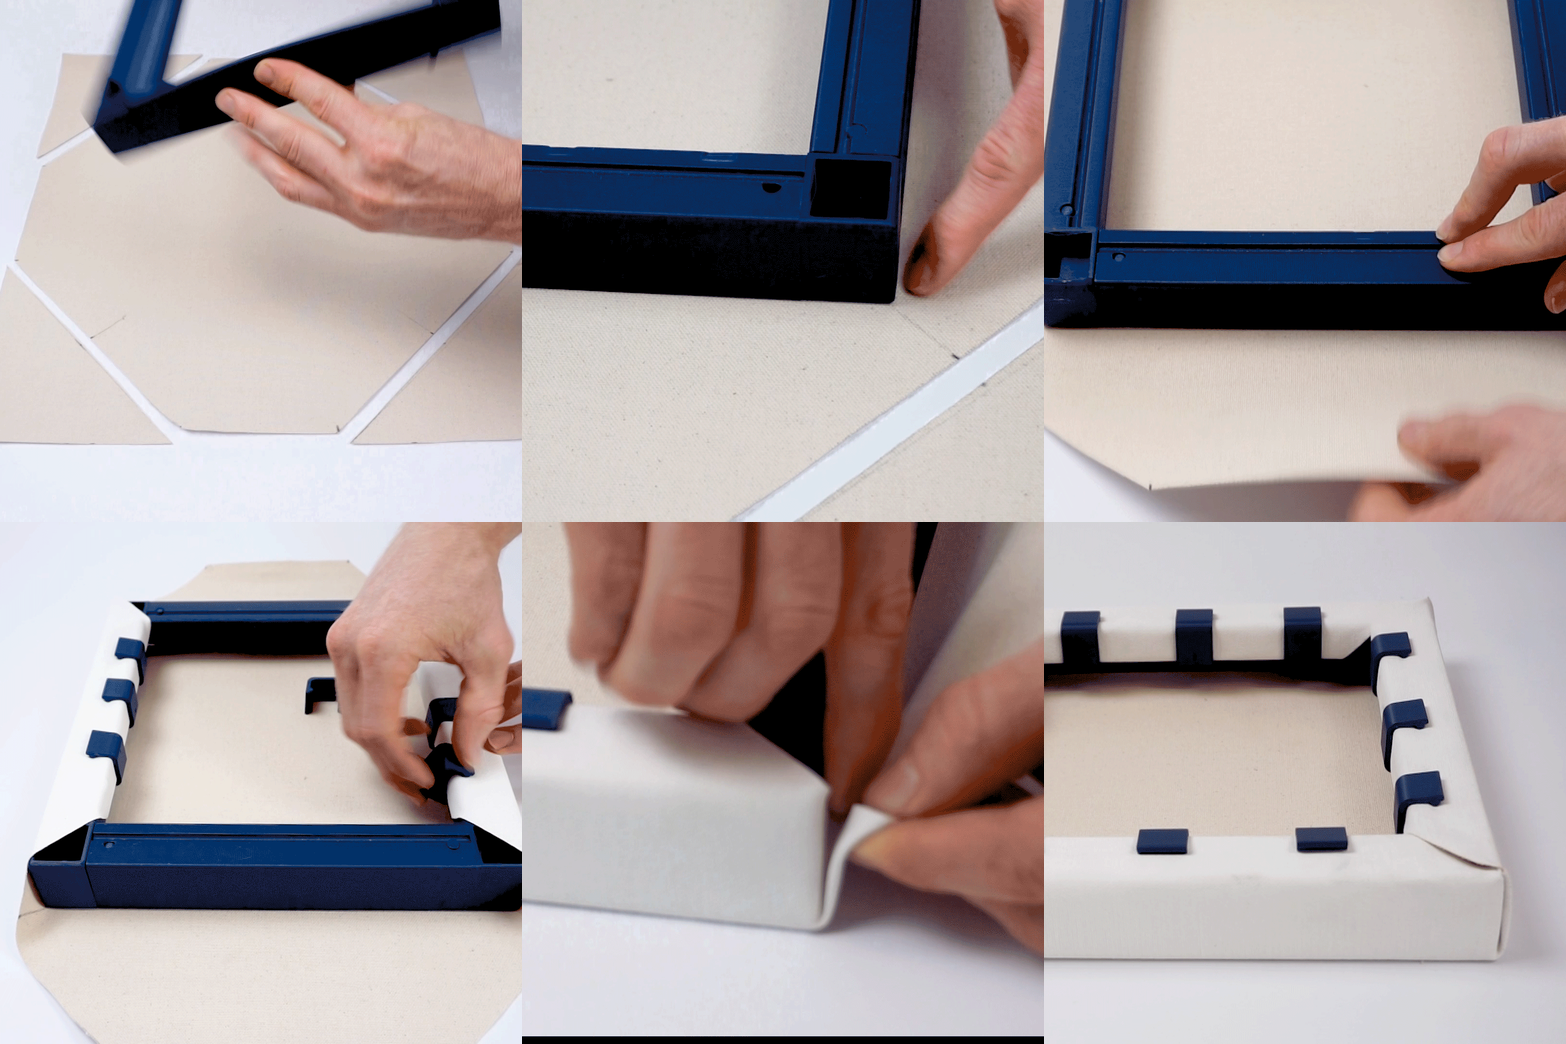
1 Module
  1. Place the Formaet upside down in the centre of the fabric with the corners coinciding with the perpendicular lines.
  2. Clip on two opposing sides of the canvas on the Formaet, tensioning the fabric.
  3. Fold the corners of the remaining two sides, one by one, making sure the folding stays parallel to the corner line.
  4. Tension the fabric on one side, adjusting the corners, and clip it on.
  5. Tension the fabric of the last side, checking that the folded corners are aligned, and clip it on.

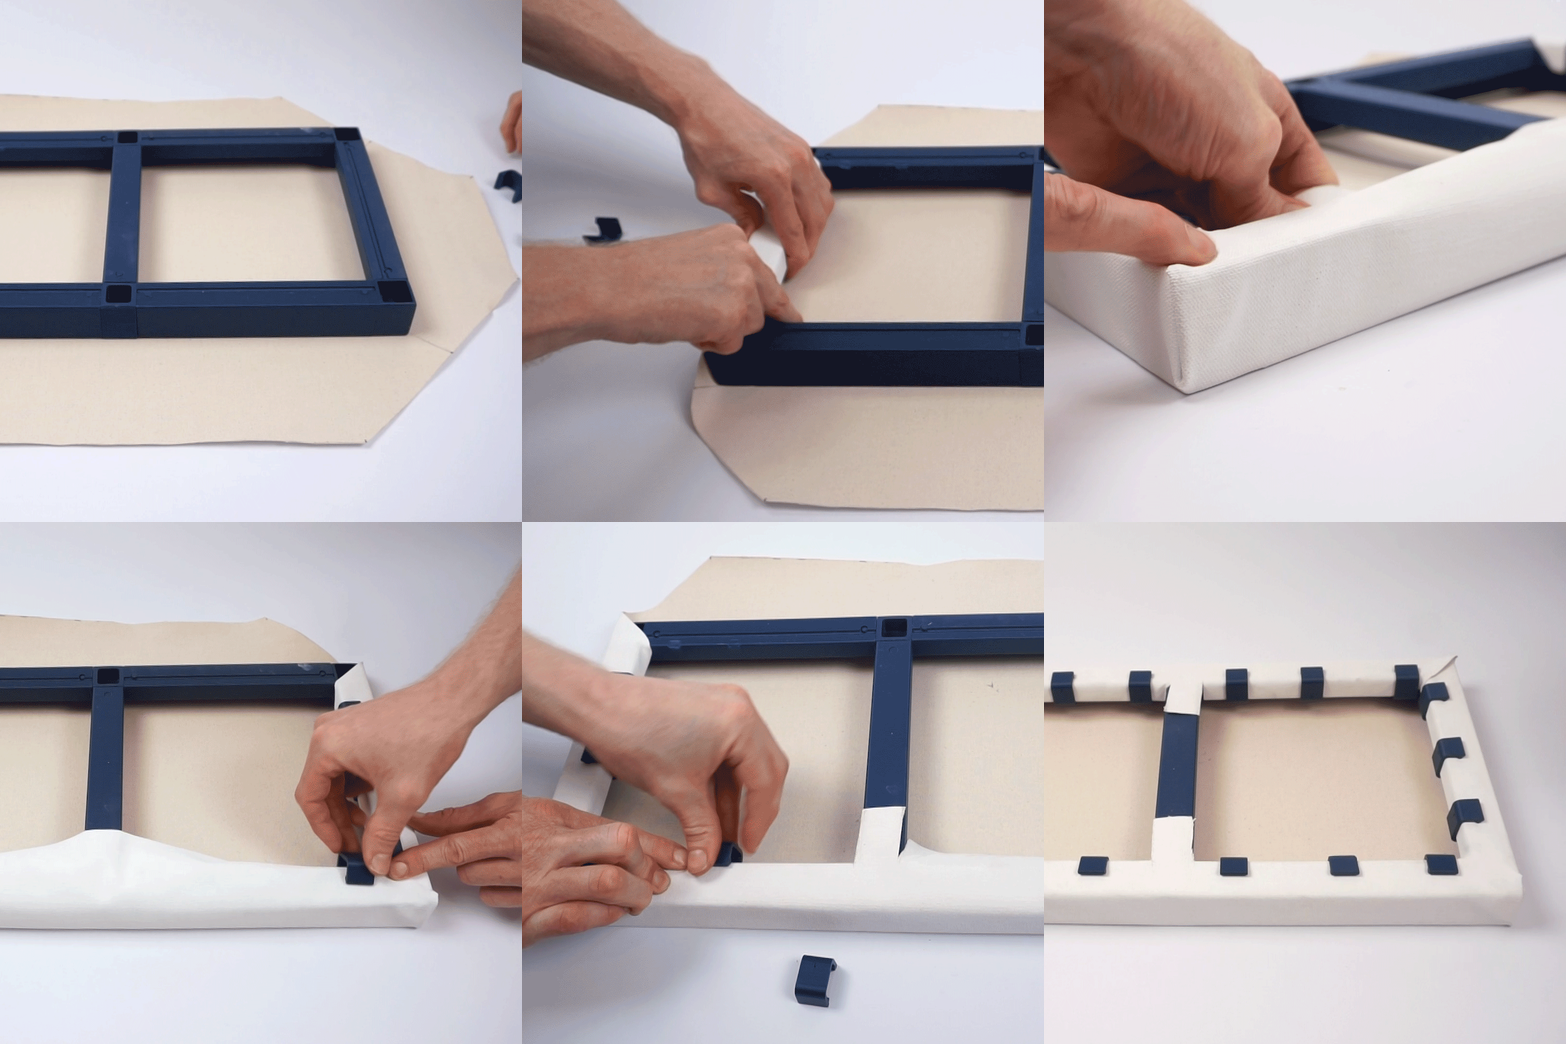
2 Modules & 4 Modules

  1. Same process as 1 module, except for the Connector T placements.
  2. Where there is a Connector T, mark the canvas fabric with two lines that follow the shape of the Interior Segment.
  3. Cut those two lines with scissors.
  4. The rest of the process is the same: tension the fabric, mount the first 2 opposing sides, fold the corners of the remaining 2 opposite sides, and clip it on.

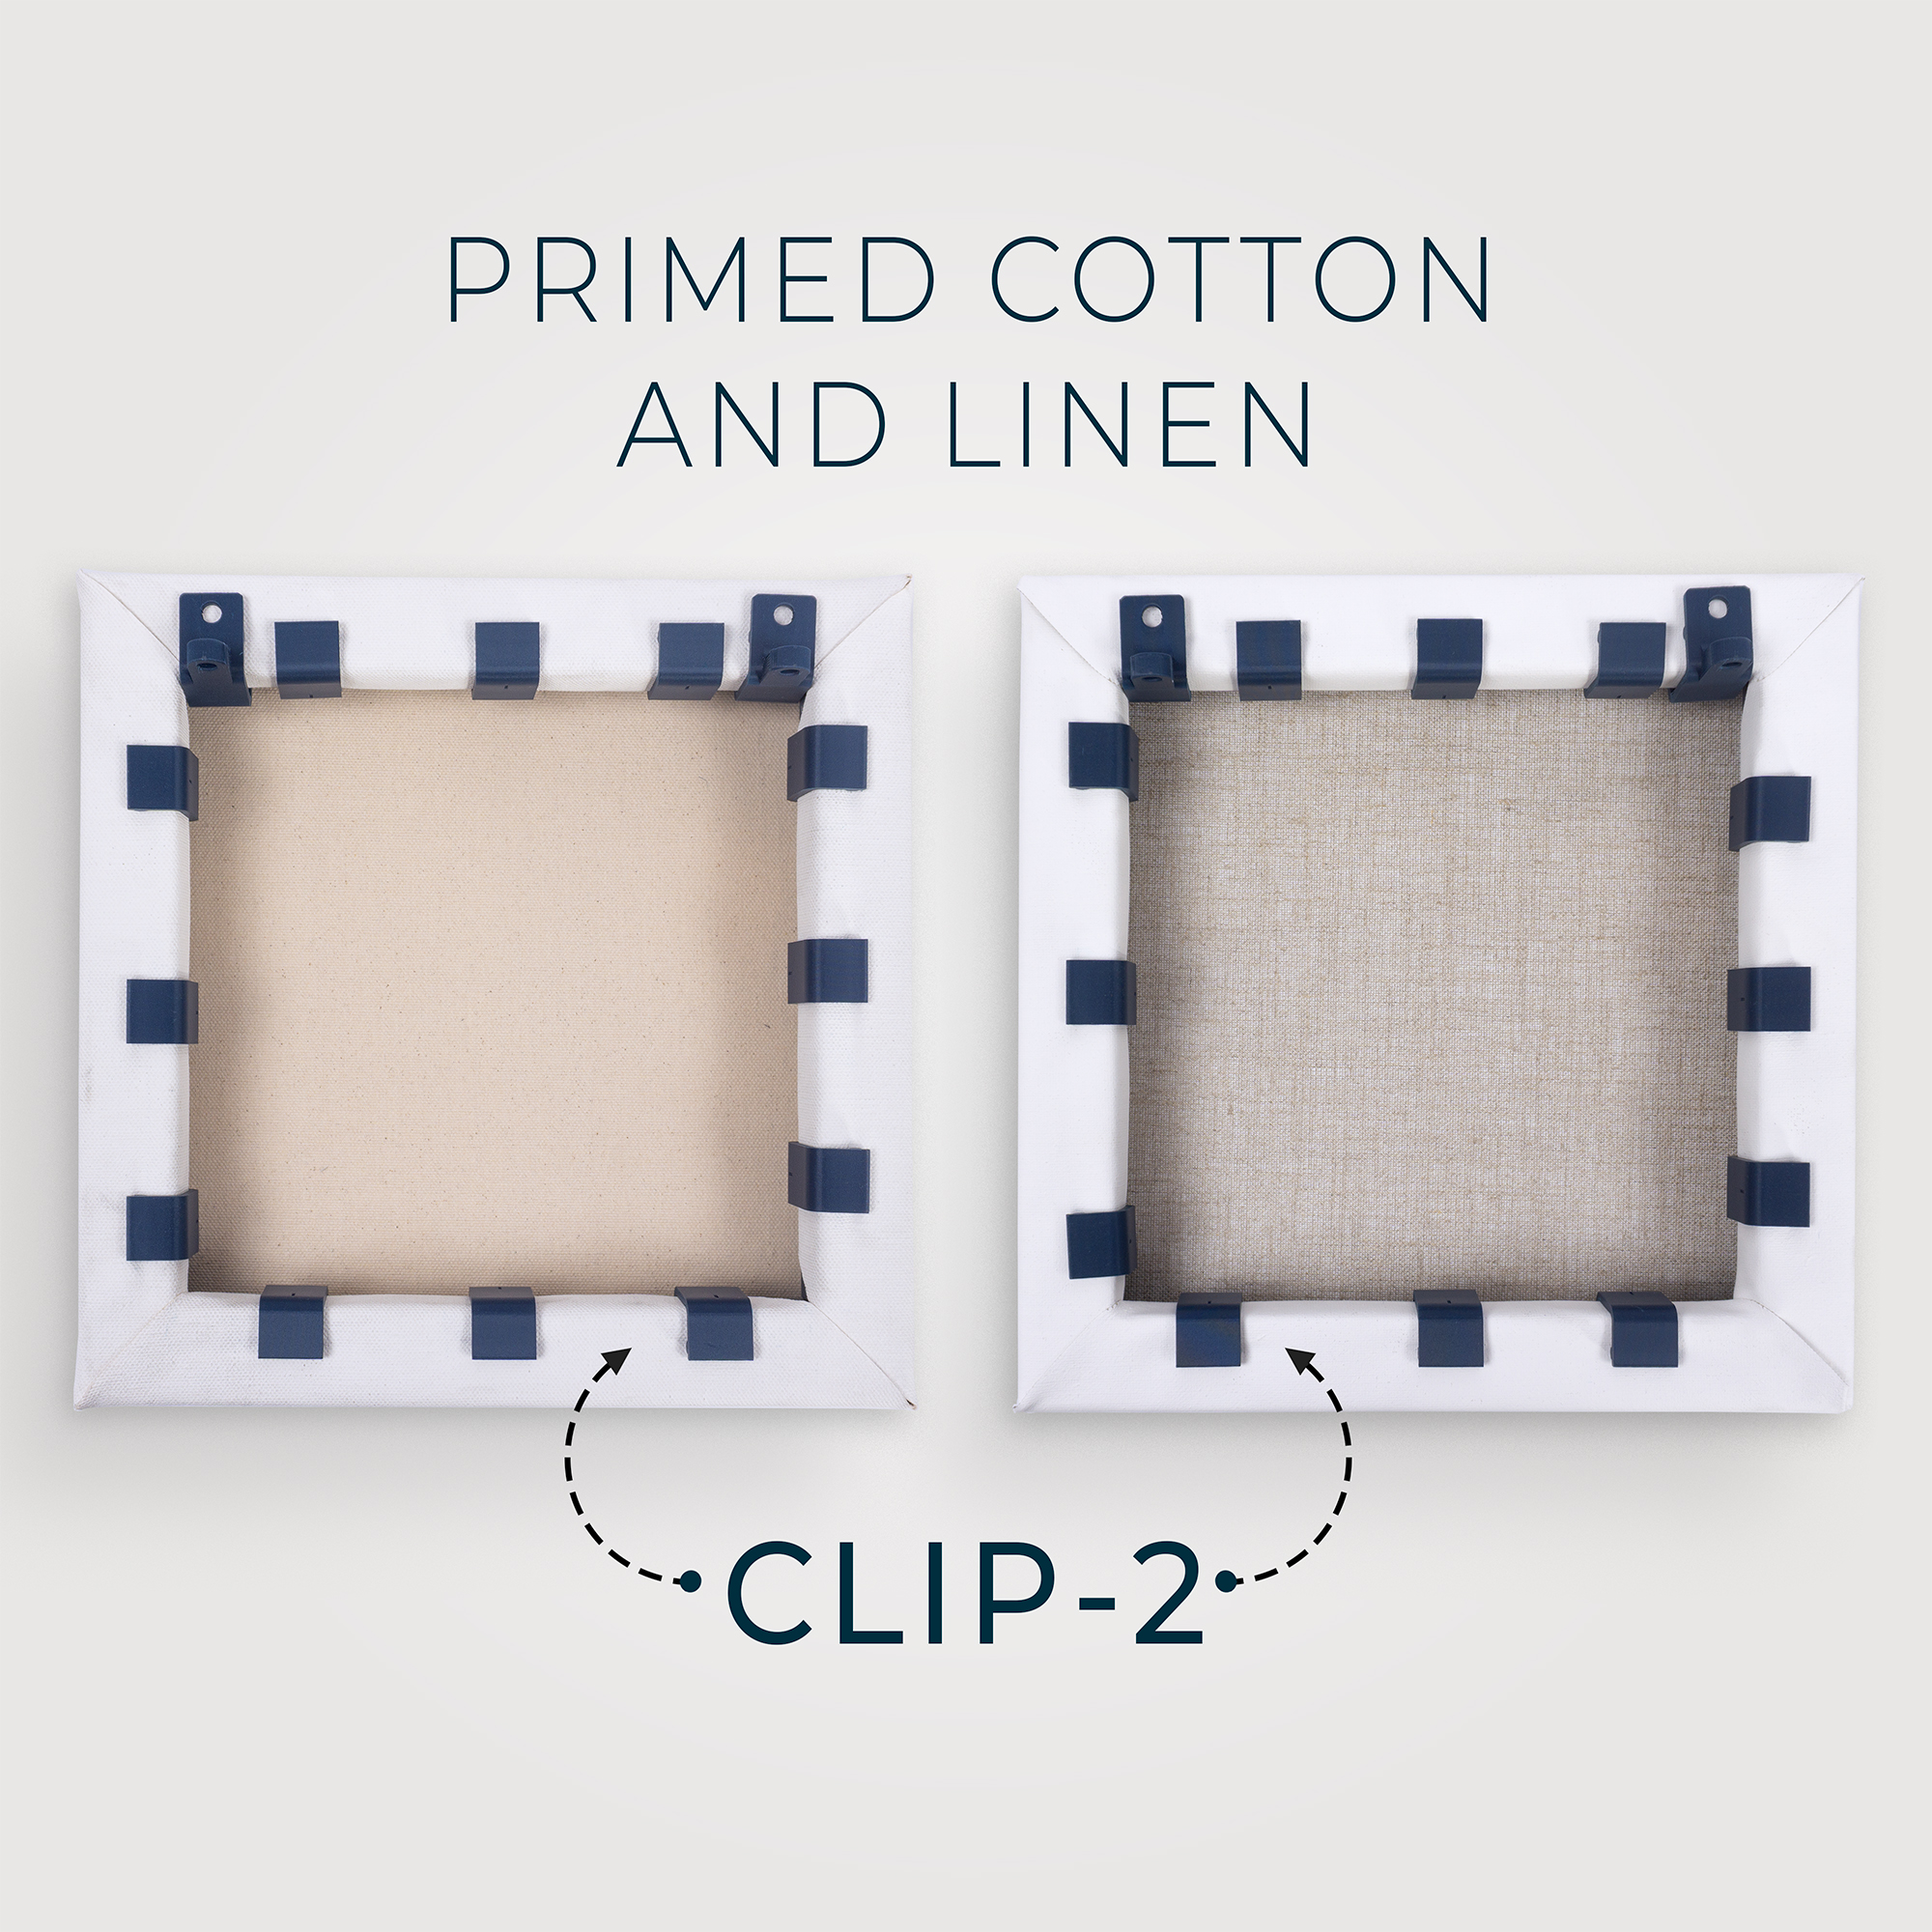
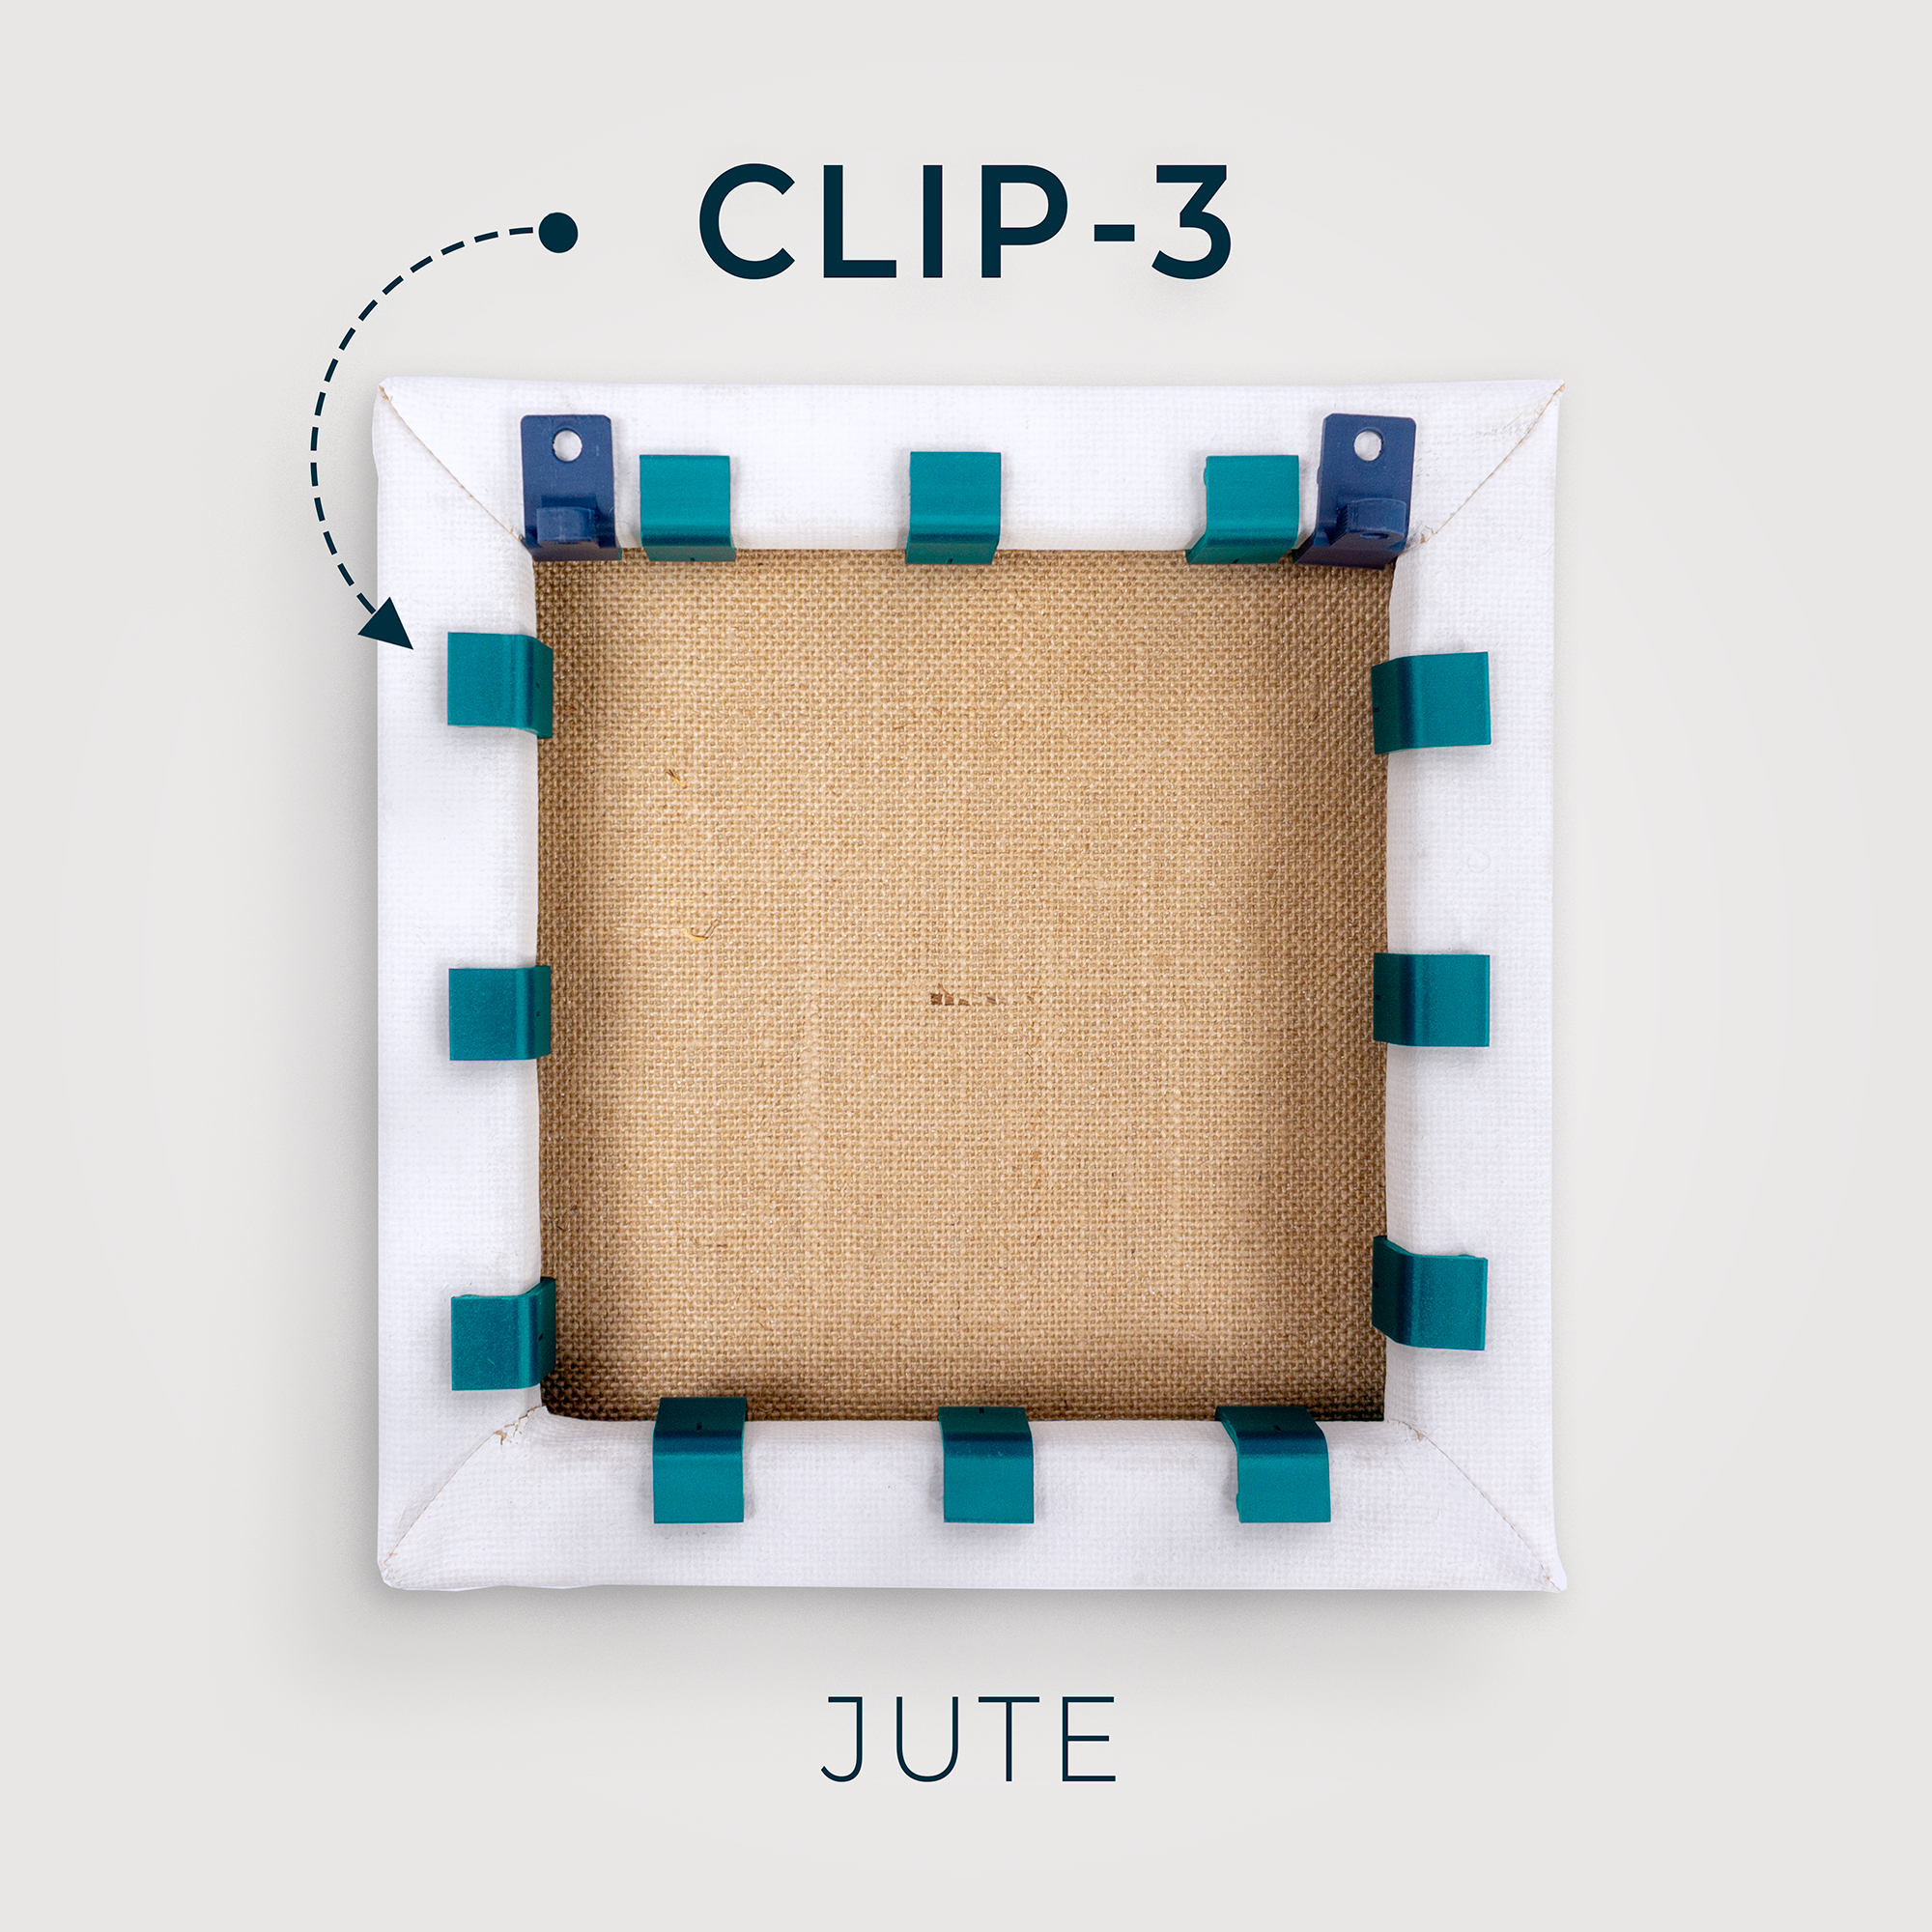
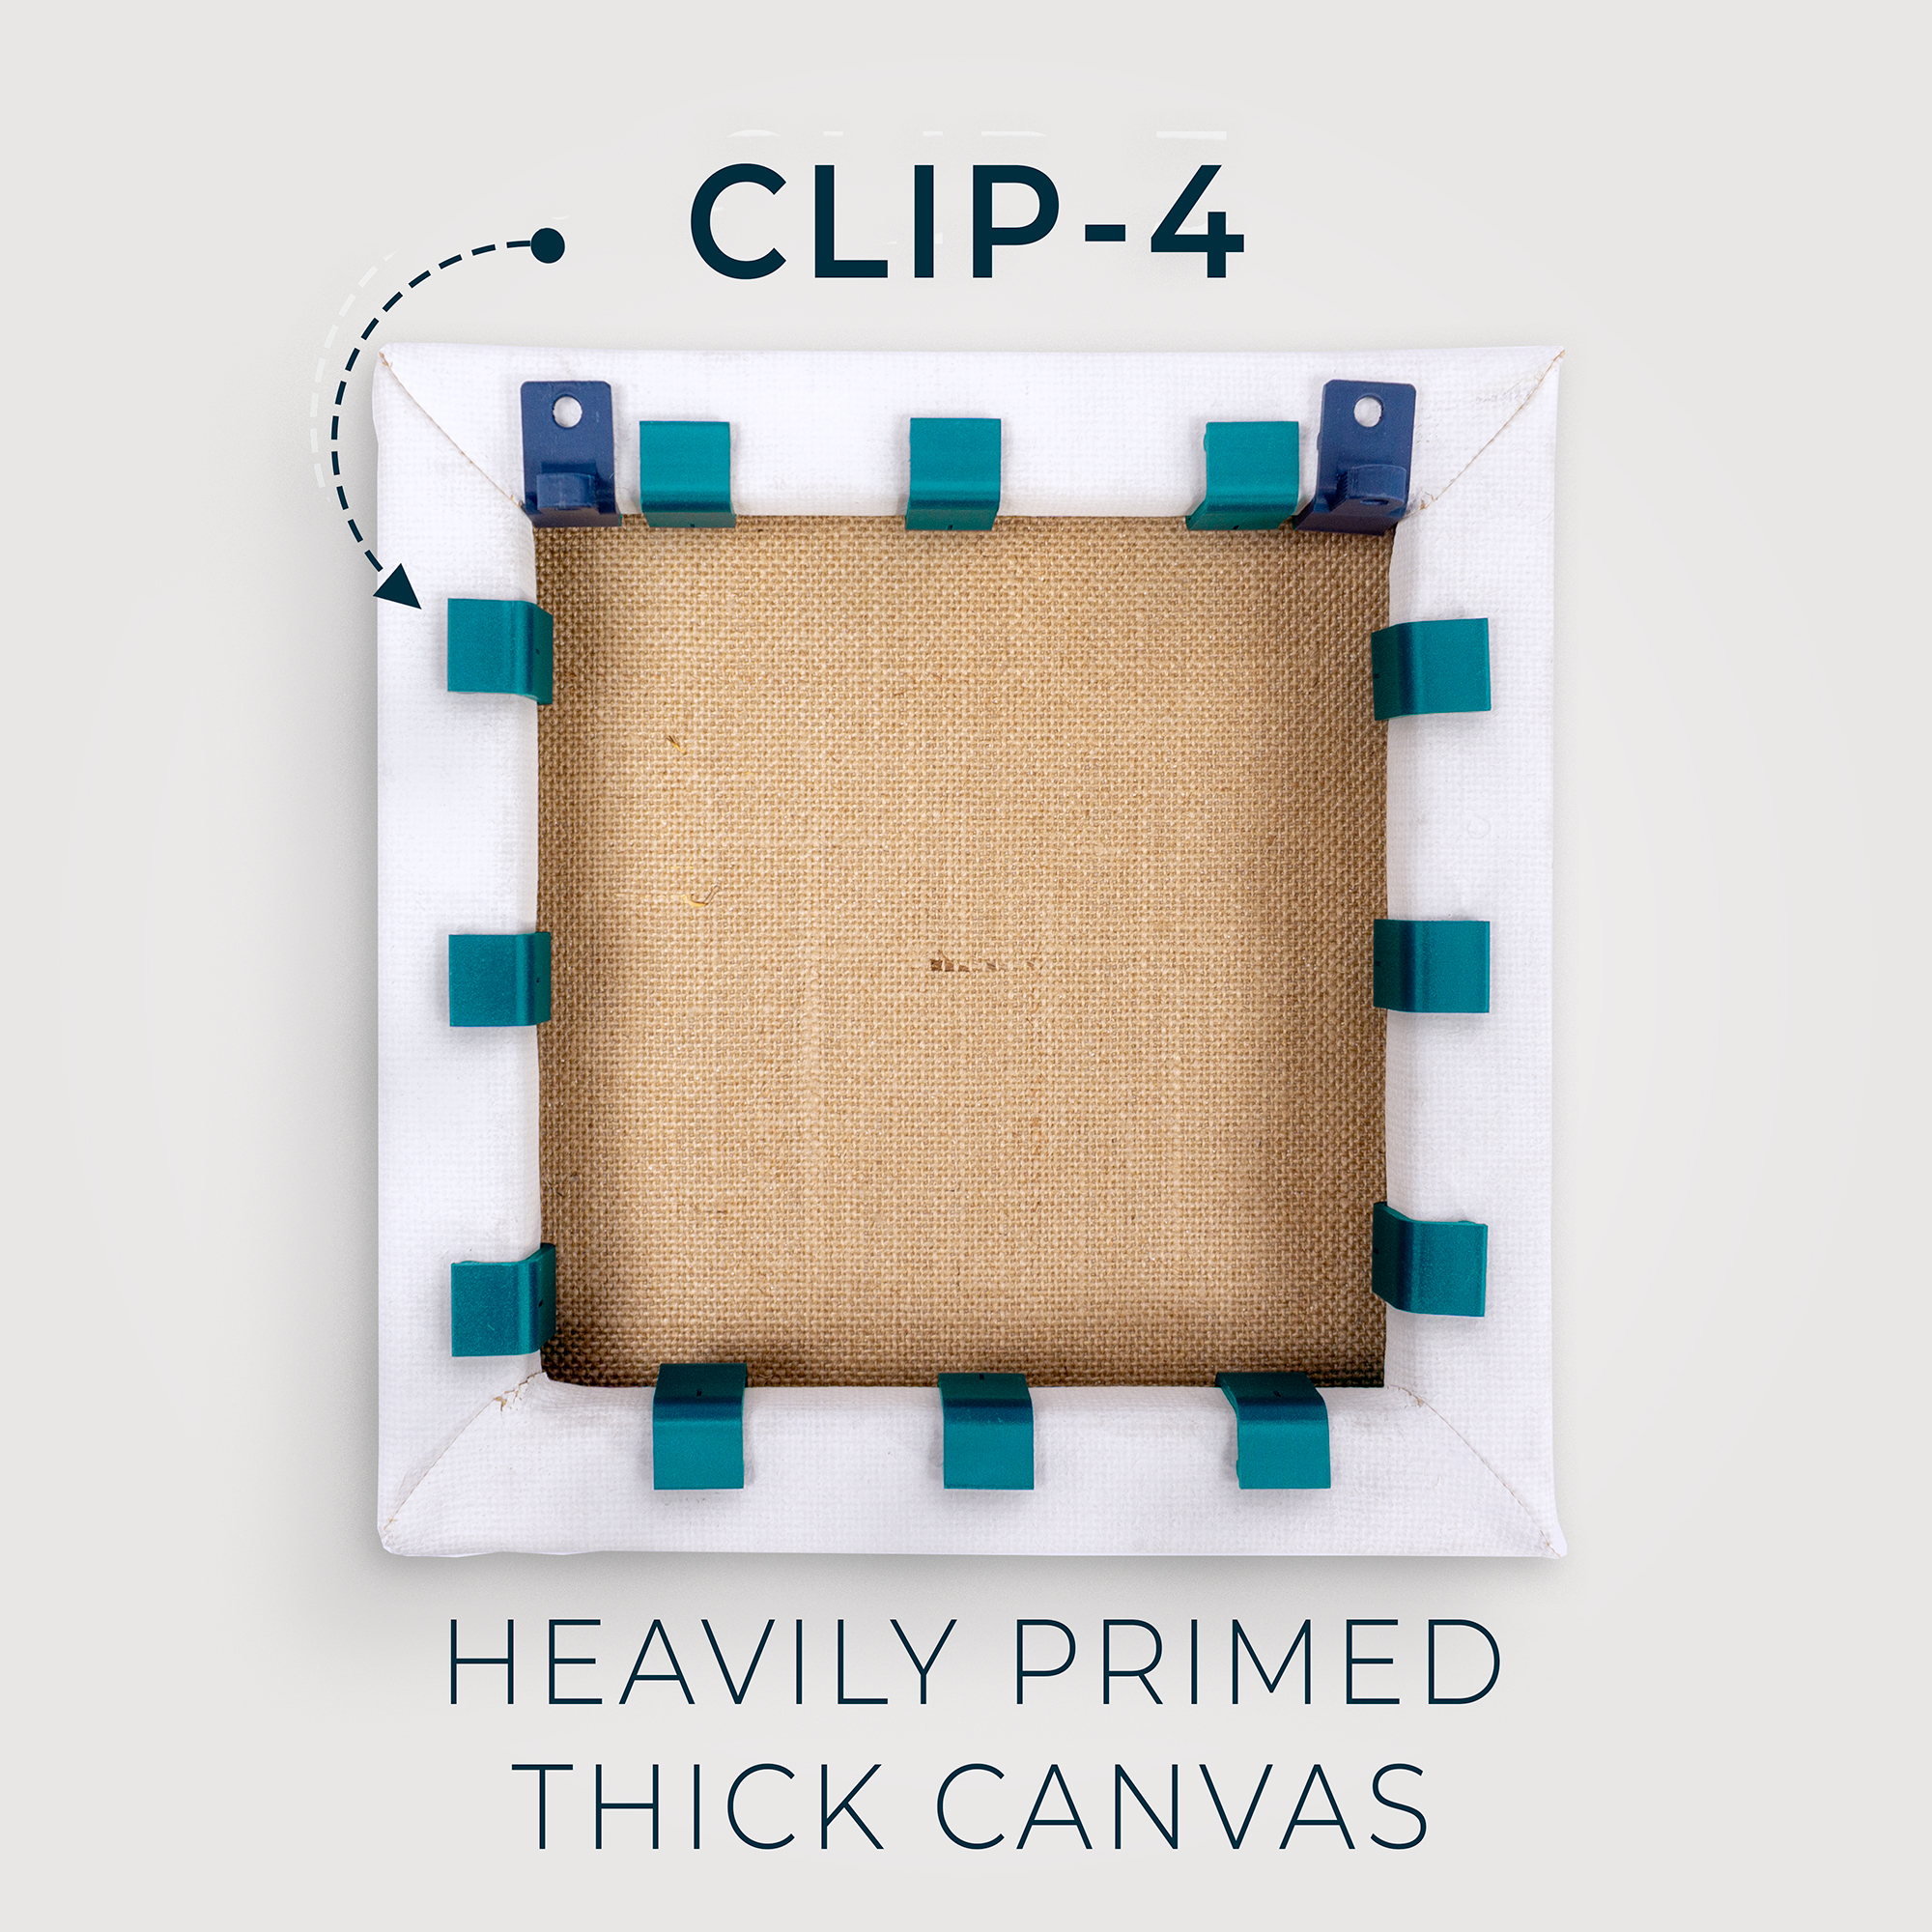
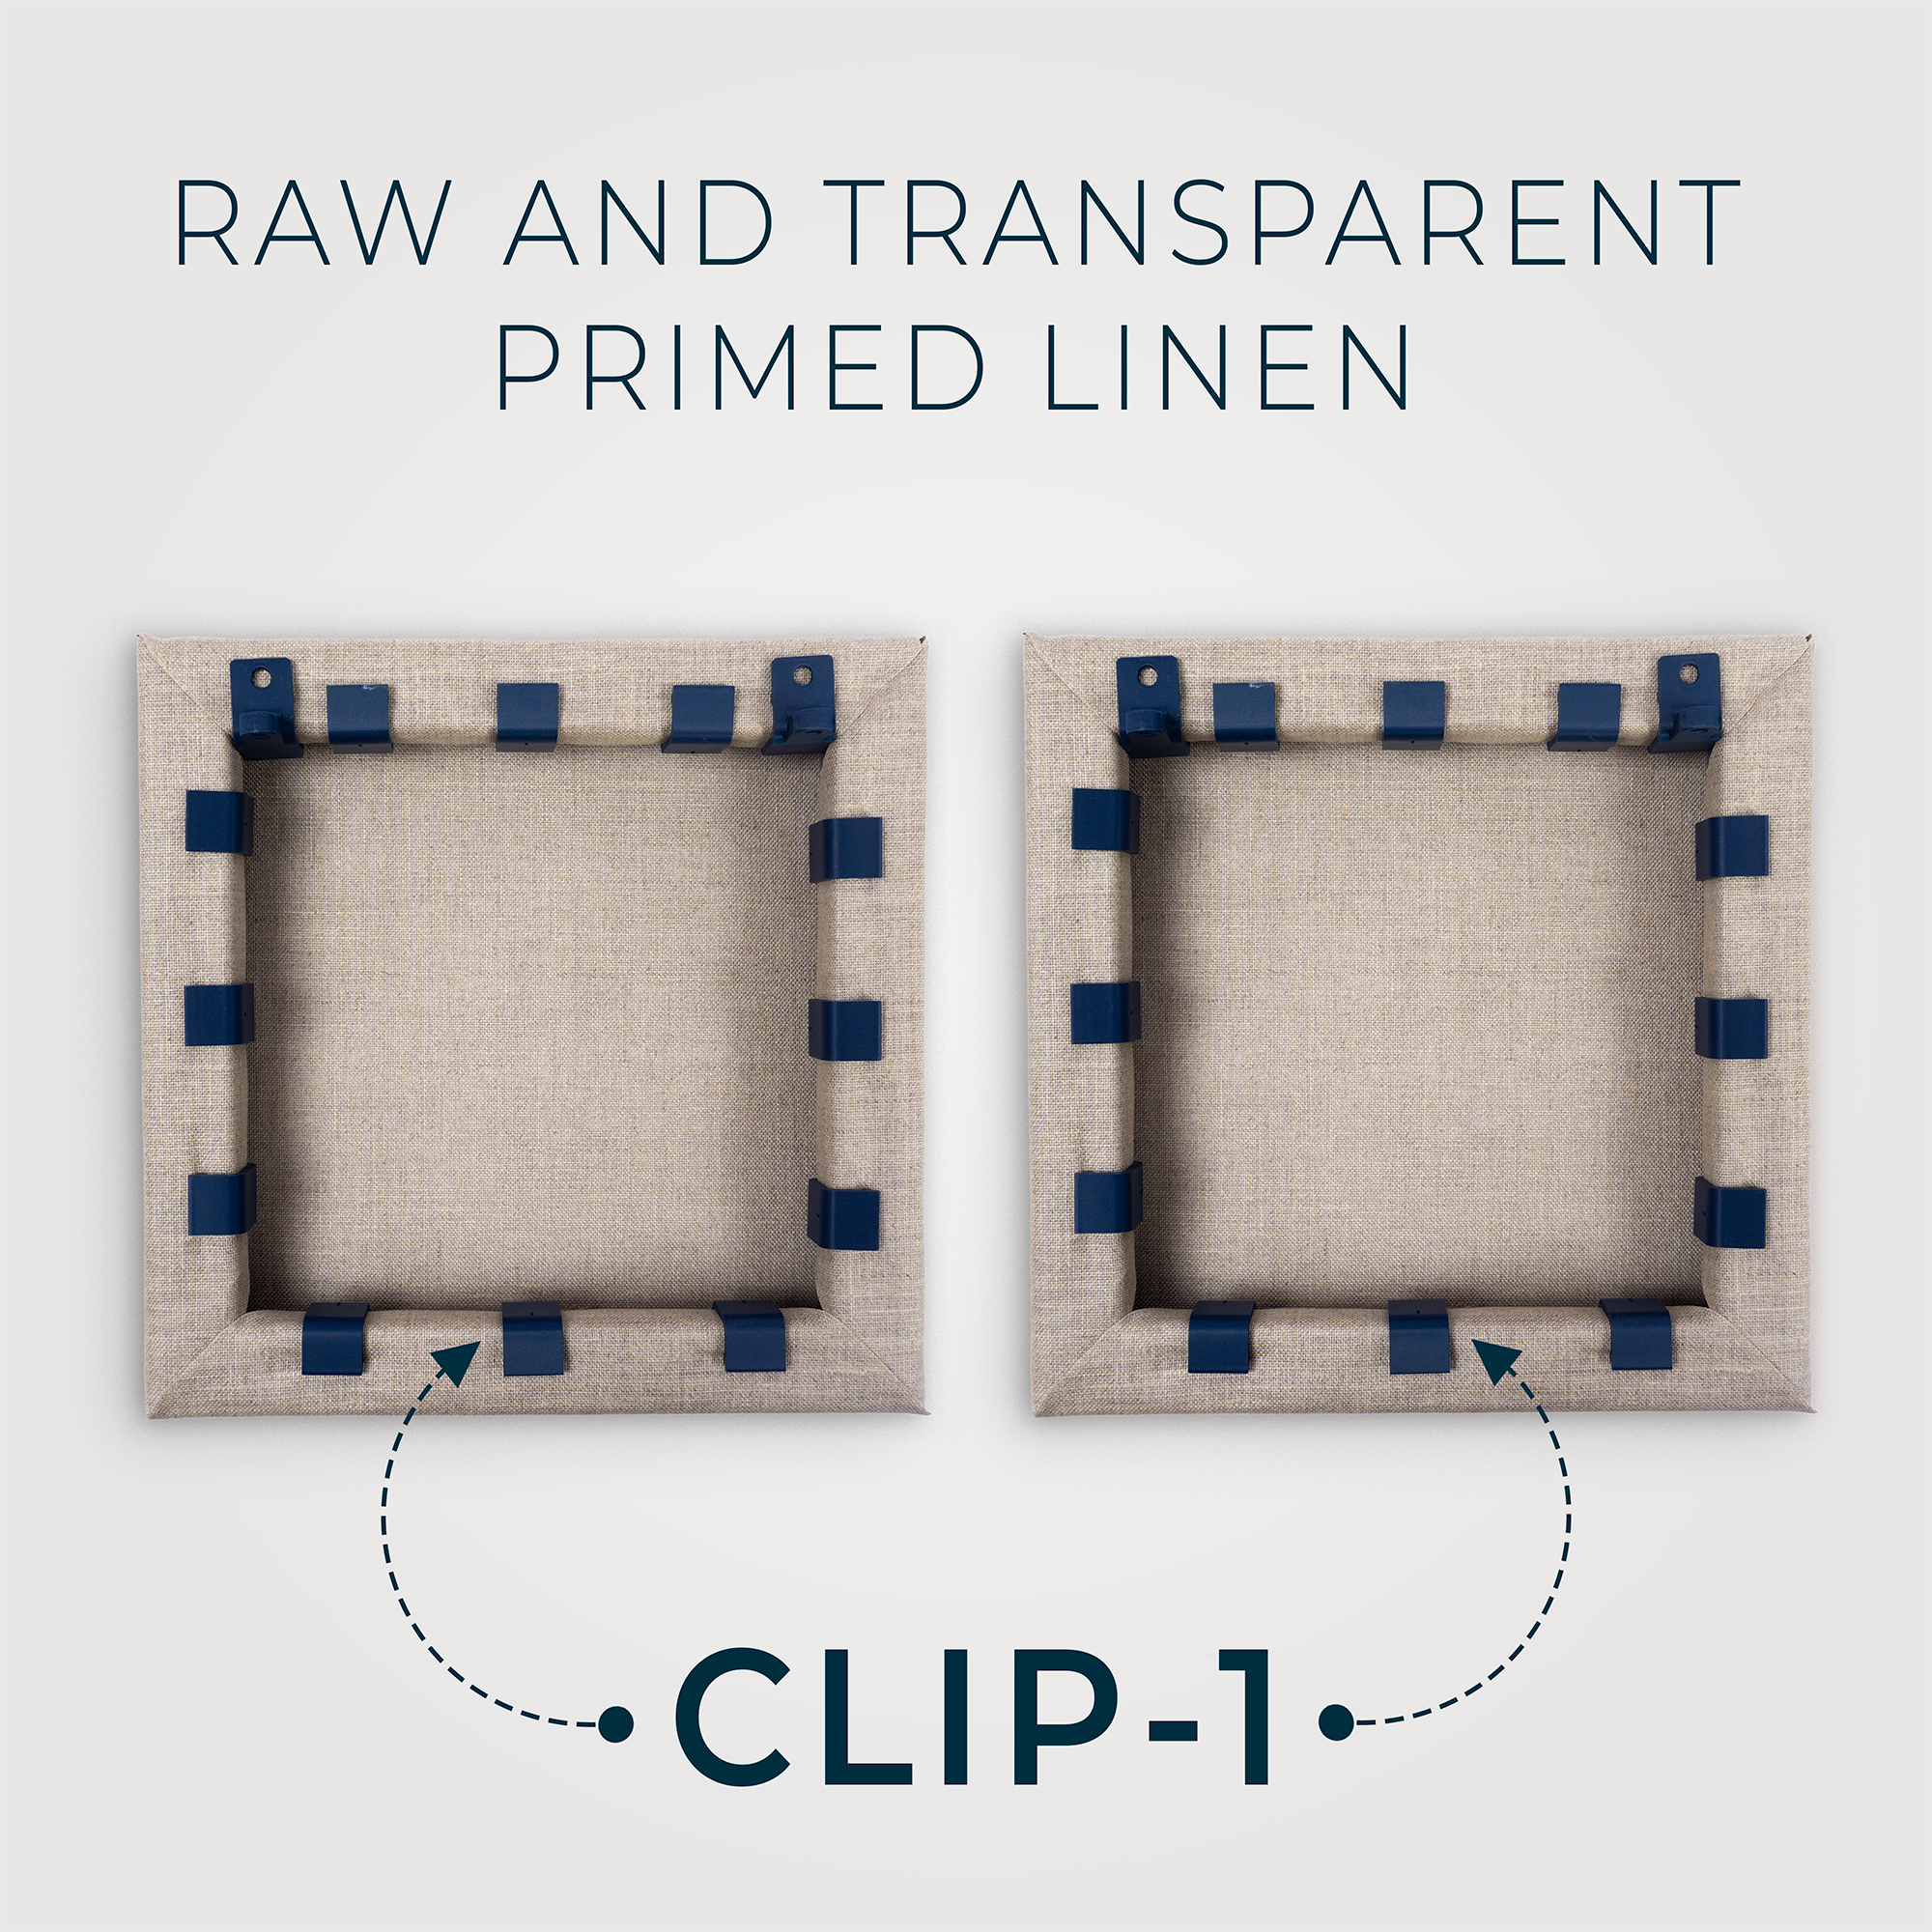
REMEMBER: The size of the CLIPS and CLIP HOOKS depends on the type of fabric you use.
Installation

Hanging your canvas
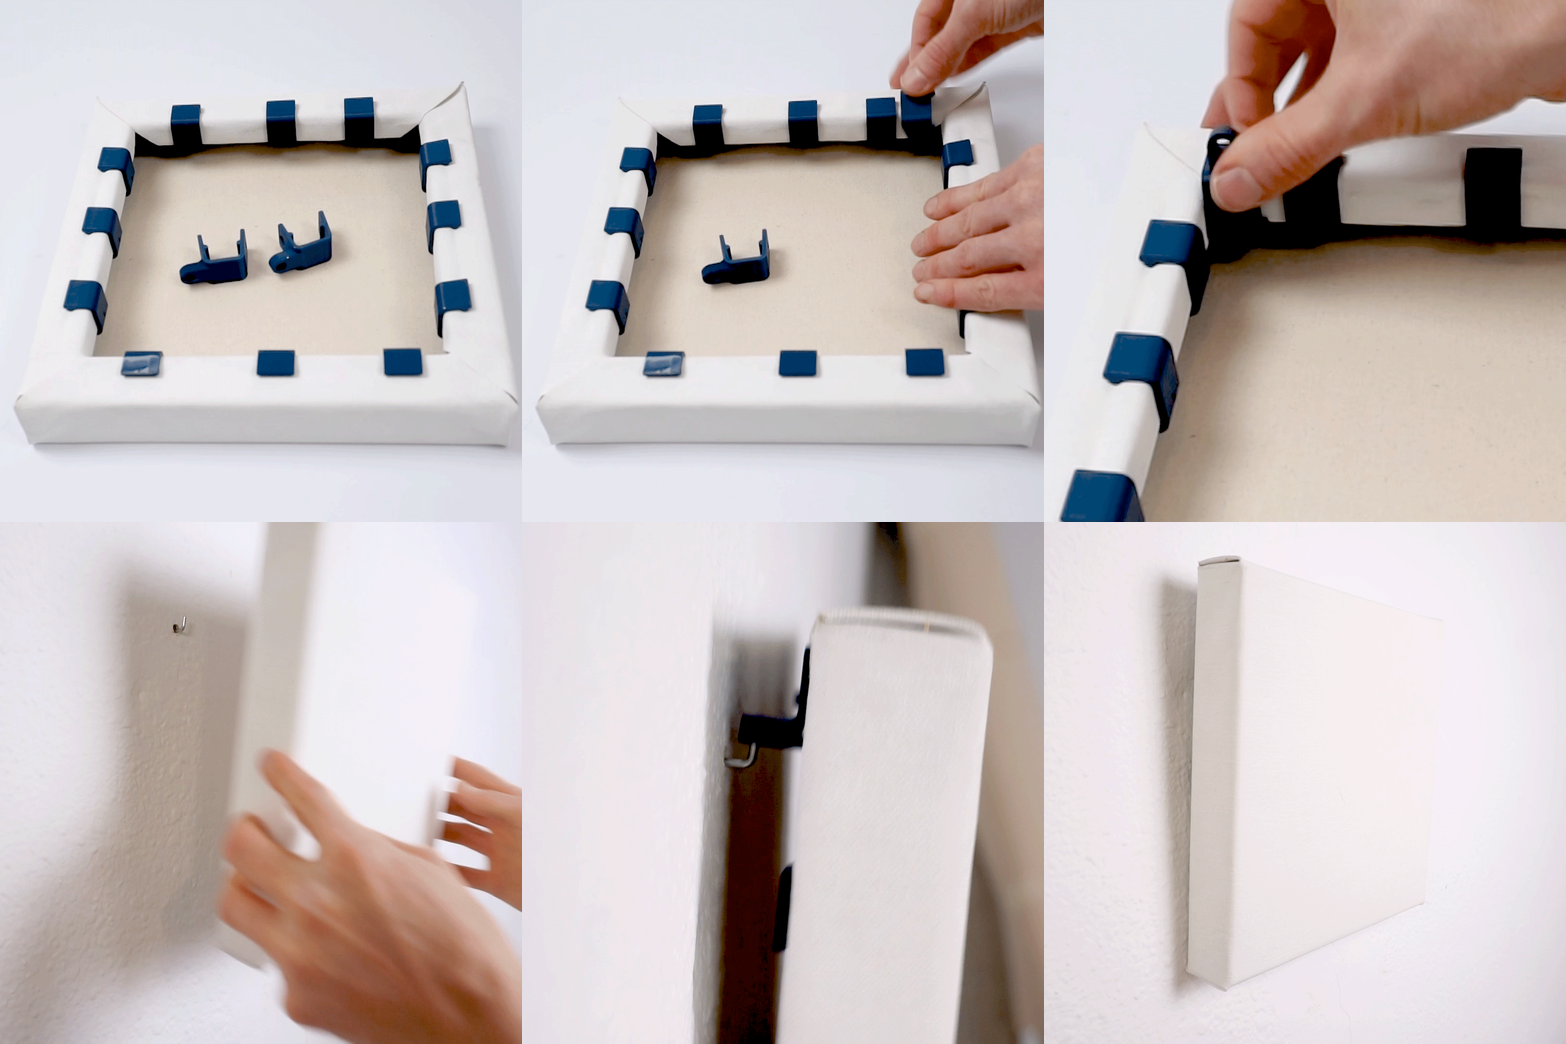
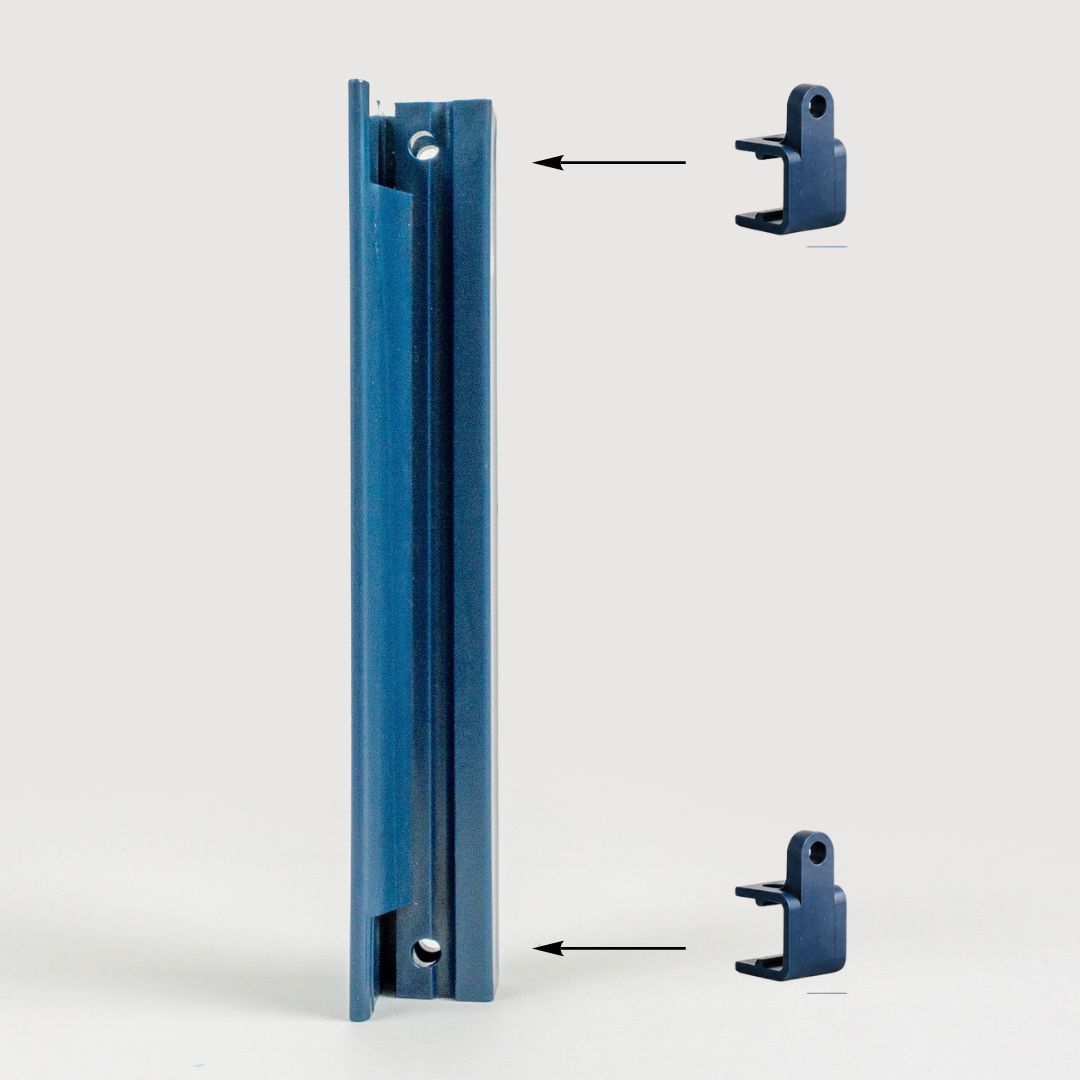
  1. Find the hollow space at the end of your top Exterior Segments; this is where the Clip Hooks attach.
  2. Clip on 2 Clip Hooks at the end of each side of the Exterior Segments at the top.
  3. Hang on the wall.
  1. If your canvas is large-scale, you can place as many Clip Hooks as you want, as long as they are placed at the end of the Exterior Segment, in the hollow space.
  2. If you want a perfectly parallel installation on the wall, you can add as many Clip Hooks as you want on the bottom part of the canvas to even them out and maintain a parallel position with respect to the wall.

Dismounting Fabric

Taking the canvas off

Release each Clip by hand, working around the perimeter the same way you mounted it. The canvas comes away undamaged — remount the same fabric later, or swap in a new one, without leaving a mark.
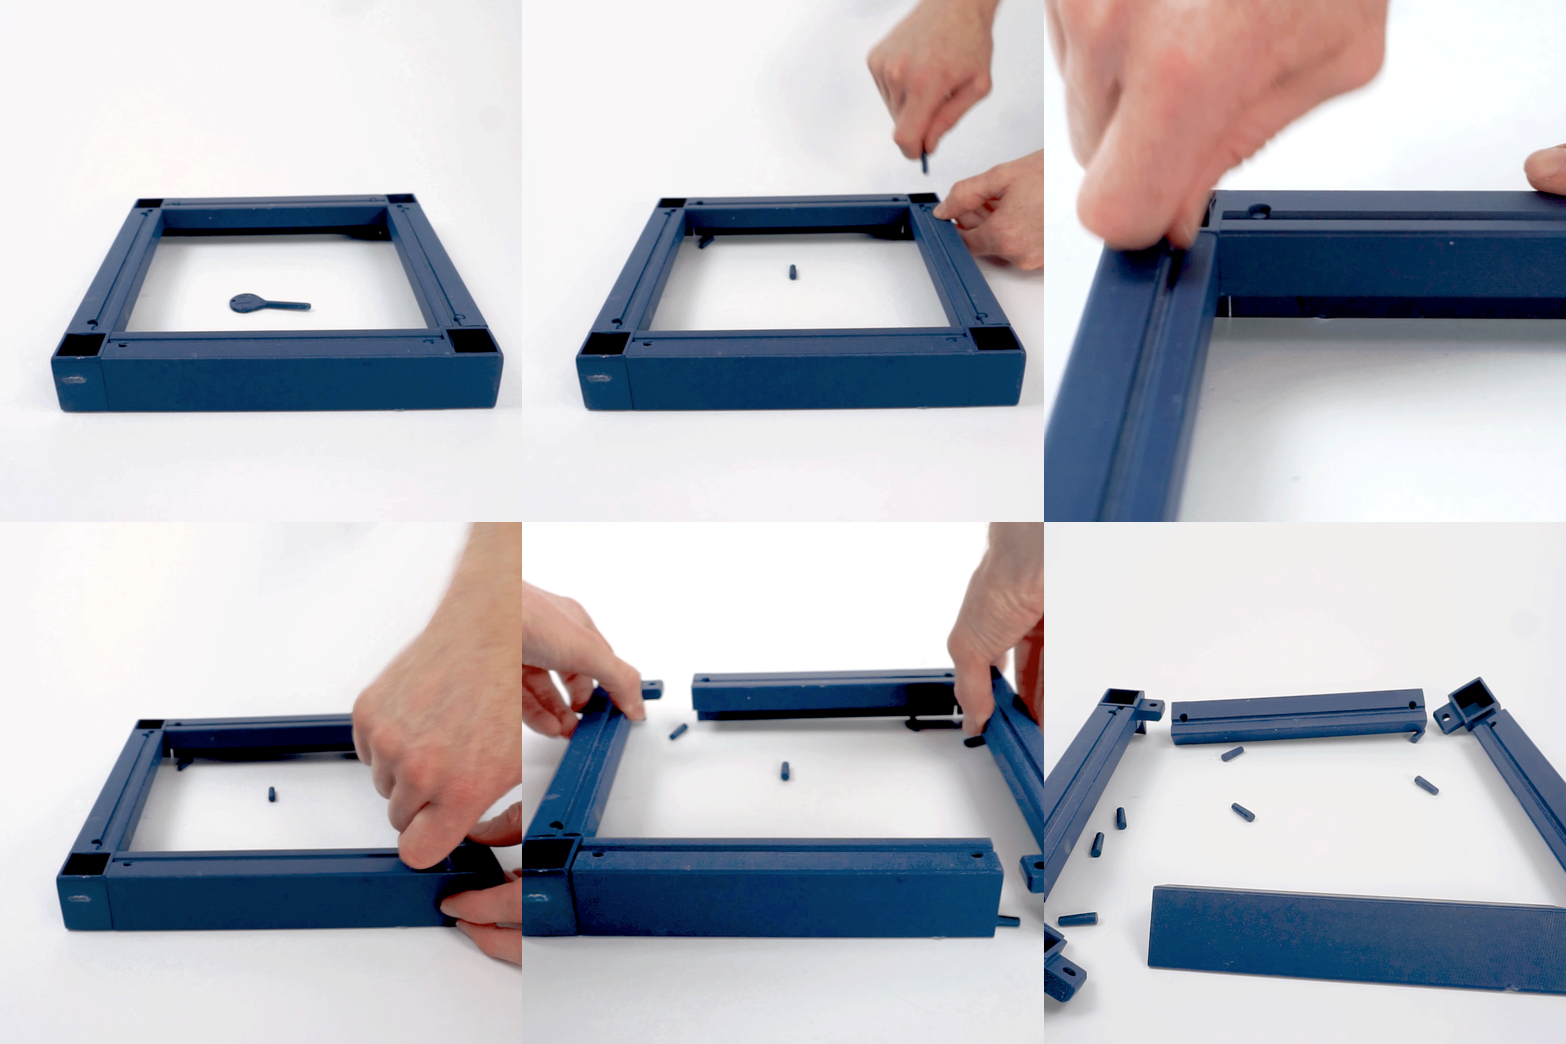
Disassembly

Breaking the canvas frame down

  1. Place the canvas frame upside down.
  2. Use the Key to push the Pins down.
  3. Pull the connectors from the Segments.
  4. You can store the parts on the original packaging for later use or easy shipping.

At a glance

One system, four
simple moves.

Build, mount, release and pack flat — the full reusable Formaet
workflow in one quick visual.
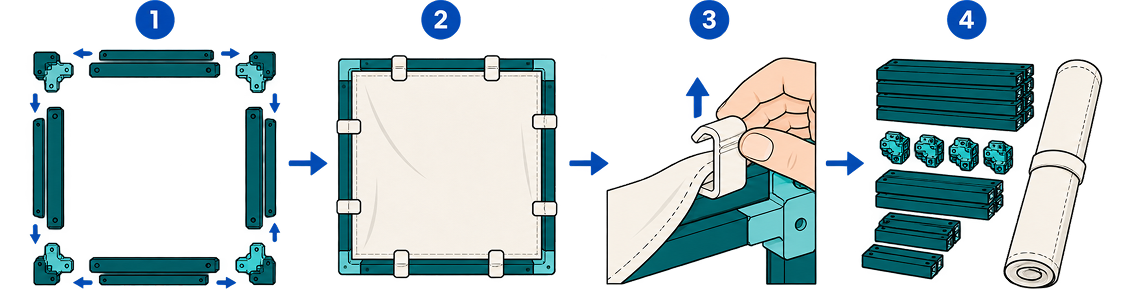
Assemble the canvas frame

Mount the canvas

Release the clips

Pack it flat

03 WHY IT'S BETTER

Why artists reach for it every time.

Save Time

Save Money

Better Creativity

Every kit removes
plastic from the ocean. Be part of the solution.

Choosing Formaet doesn’t just get you a better canvas system — it directly funds the removal and reuse of ocean bound plastic, kit by kit.